I have had a project in mind for a while now, to update the decor in my dining room. It was looking tired and a bit too "1970s". By that I mean that whilst the pine dining table is still strong and useful -having been used for 40 years already -the chairs were grimy and could not be cleaned any more, and the whole thing was a bit too much of the dark heritage green everywhere. I could have painted the chairs, but I decided that I didn't like the business of removing the old finish with stripper. Something about the dire health warnings on the can, really put me off!
Whilst we will be spending some serious money on the kitchen renovation, I wanted the dining room to be refreshed without too much spent on it.
We spotted some chairs we liked in shop in Mount Lawley for $200 each, and they reminded me of ones I had seen in Ikea, so we went there and got pretty much the same things for $50 each.
We had a gallery wall with a collection of landscapes, mostly framed in dark brown cheap frames, and we were a bit tired of them, although some were actually artists' signed prints and originals.
I decided on these principles for the art I want to hang here:
- Cost no more than $50
- Be bright and fresh
- Framed in white or gold (no more brown frames)
- Original or artists' prints for preference
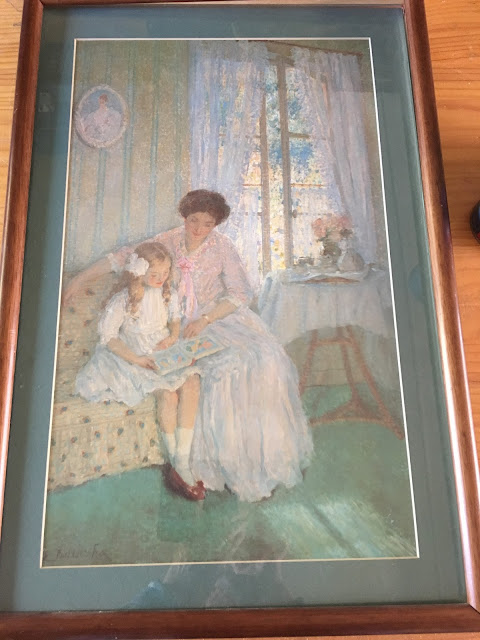
There was one technique which I wanted to try on a picture frame which I didn't care about, to see if I could make it work on an original water colour landscape I wanted to update, so I went to the op shop and bought this - a print by an Australian female painter, and one I had seen in a gallery. What interested me was seeing if I could paint the brown frame, and also the teal coloured matt board. The picture cost $7 in total.
I felt the teal board was too close in colour to the greens and blues in the picture itself, and that the brown frame was showing signs of wear.
I took it all apart, and spray painted the frame with some gold paint I had in the shed.
I mixed a sort of light yellow in acrylic artist paint kindly supplied by my DD and used a roller to make a number of coats on the matt board.
DH supplied the tacks and the paper tape to refinish the back of the frame, and some new wire to hang it.
In real life the gold frame and yellow matt has lifted the colours of the painting to be more distinct and the light in the window, and the colours of the lady's gown are warmer.
The next transformation was for a couple of artist's prints of WA wildflowers from our lovely Albany region. The grey matt and clip frame were doing nothing for them.
I found two gold frames in an op shop for $4 each, and it was an easy swap.
I have hung some new pictures -one the signed print given me by work colleagues - here .
This is still a work in progress. We have plans to repaint the room and paint the top of the dining table, at the least. There are more pictures to revamp, but I am pleased at the start I have made. I am going to have a go at the original water colour next, I think.


2 comments:
WOW you really could see how the 1st picture went from being 'cold' to very 'warm' by just changing the colours. well done
have you thought about just painting the underneath of the table & leaving the top plain? if you look up 'chalk painters Australia' & on pinterest you'll get lots of ideas as well.
i love the look of wood but sometimes a coat of paint to break it up can make all the difference. hope your old chairs find a good home too.
thanx for sharing
What a huge difference you made by changing the colours of the frame work. Love them!
Love your new chairs too, they look fantastic with your table. Great way to brighten things up :)
xTania
Post a Comment